In Blender, my "Team" has created 3 Scenes:
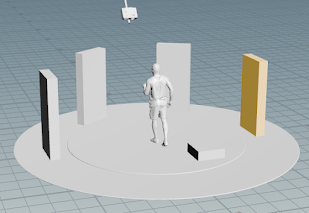
A block out scene created by the concept artist


A scene with modeled display screens created by the hard-surface modeler


To export these scenes as USD: File>Export>Universal Scene Description

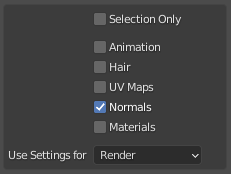
This dialogue will appear.

For this file, I will uncheck UV maps and materials as I have not created any.
From my tests USD, USDC, and USDA all work with Houdini Solaris. Blender defaults to USDC but, if you want to change it, just type USD in the dialogue then hit 'Export USD'.
Now I will bring the files into Houdini Solaris.

Switch the workspace to Solaris which should look like this.


Add a file node.


If I hit accept I can see my scene graph and my 3D scene.
I get this error message but it hasn't caused any problems so I have been ignoring it until I have time to look up the issue.
In the properties panel, I can import a USD scene to the file node by clicking the paper with a mouse icon.
If I hit accept I can see my scene graph and my 3D scene.


Because Blender is a silly program that uses the Z-axis as the up axis everything is sideways. To fix this I added a transform node and rotated it -90 degrees in X.


This could easily be put into a subnetwork and turned into an HDA so that you only have to do it once but for now I will just copy it 3 times and import the other files.

I will add a null buffer in case any of the artists create future versions that they would like to merge in before I merge the different artist's versions together.

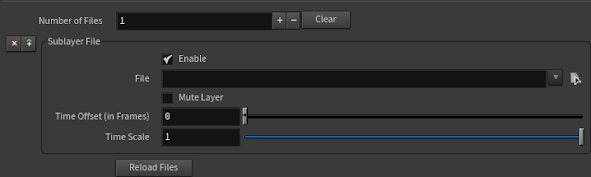
As I select each null I can watch the scene graph change to reflect the selected scene. If I add a sublayer node between the 'Block In' and 'Display Model' scenes and change the sublayer type to sublayer inputs then I can layer the two scenes on top of each other.


This is the step where all my first attempt errors became visible.
At first, I made the mistake of keeping the object namespace the same but not the mesh namespace. Here you can see the mistake I've made.


While The Xform objects were given the right name the meshes that belong to them were not (except for the first one that I fixed to show how the merging would occur differently).
First Layer Second Layer


First, notice that the 3 that had the wrong mesh name for the object now have 2 meshes per transform meanwhile the one that was named correctly has replaced the mesh that was in the block out scene.
Also, notice how in the composite scene the layout cubes are facing the same way? This is because the scene with the more complete display screens had the rotation applied so that their local axis was in line with the global axis. Because the Xform objects still had the same name, the transformations were overridden even though both meshes were kept.
as soon as the namespaces were fixed the layering worked as expected


The first two scenes layered similar scenes. What If I just want to layer a single asset I can use a reference node to select just the mesh from the 'Boss Kids' Scene.


Once I have the mesh selected I can place it within the transform and disable the placeholder.


These are my explorations with USD so far more to come :)


